学习资源:
https://cn.julialang.org/ julia中文社区
Basic julia syntax cheatsheet in the form of a Pluto notebook (Pluto notebook)
julia hub-查找julia安装包
julia-机器学习高性能计算学习 https://github.com/mitmath/18337 主页
Julia Package
DiffEqFlux: Generalized Physics-Informed and Scientific Machine Learning (SciML)
-

D ebugger.jl
LearnJulia2020
AlphaZeros.jl
DiffEqUncertainty.jl

Weave.jl 用来写文章 atom need to install language-weave pacage in setting
Julia debugger - https://www.youtube.com/watch?v=SU0SmQnnGys
详细介绍:http://webpages.csus.edu/fitzgerald/julia-debugger-tutorial/
To evaluate any Julia expression, we type ``` (a backtick) and Debugger gives us a Julia prompt. (windows键盘为中/英文+左上角. )(mac 为 option+左上角.)
在atom中,gui界面debugger
1 | julia> Juno.@enter maxsum() |
Below, square brackets denote optional arguments.····
Misc:
- o: open the current line in an editor
- q: quit the debugger, returning nothing
- C: toggle compiled mode
- L: toggle showing lowered code instead of source code
- +/-: increase / decrease the number of lines of source code shown
Stepping (basic):
- n: step to the next line
- u [i::Int]: step until line i or the next line past the current line
- s: step into the next call
- so: step out of the current call
- c: continue execution until a breakpoint is hit
- f [i::Int]: go to the i-th function in the call stack (stepping is only possible in the function at the top of the call stack)
- up/down [i::Int] go up or down one or i functions in the call stack
Stepping (advanced):
- nc: step to the next call
- se: step one expression step
- si: same as se but step into a call if a call is the next expression
- sg: step into a generated function
Querying:
- st: show the “status” (current function, source code and current expression to run)
- bt: show a backtrace
- fr [i::Int]: show all variables in the current or ith frame
Evaluation:
- w
- w add expr: add an expression to the watch list
- w: show all watch expressions evaluated in the current function’s context
- w rm [i::Int]: remove all or the i:th watch expression
Breakpoints:
- bp add
- bp add “file.jl”:line [cond]: add a breakpoint att file file.jl on line line with condition cond
- bp add func [:line] [cond]: add a breakpoint to function func at line line (defaulting to first line) with condition cond
- bp add func(::Float64, Int)[:line] [cond]: add a breakpoint to methods matching the signature at line line (defaulting to first line) with condition cond
- bp add func(x, y)[:line] [cond]: add a breakpoint to the method matching the types of the local variable x, y etc with condition cond
- bp add line [cond] add a breakpoint to line of the file of the current function with condition cond
- bp show all breakpoints
- bp rm [i::Int]: remove all or the i:th breakpoint
- bp toggle [i::Int]: toggle all or the i:th breakpoint
- bp disable [i::Int]: disable all or the i:th breakpoint
- bp enable [i::Int]: enable all or the i:th breakpoint
- bp on/off
- bp on/off error - turn on or off break on error
- bp on/off throw - turn on or off break on throw
An empty command will execute the previous command.
Hit ` to enter “evaluation mode,” where any expression you type is executed in the debug context. Hit backspace as the first character of the line (or ^C anywhere) to return to “debug mode.”
1|de
Julia 安装
1 | docker run -it --rm -v /Users/wjq:/Users/wjq/Documents/GitHub/Test/Test08 -w /Users/wjq/Documents/GitHub/Test/Test08 julia |
—rm命令慎用,因为重启后之前保存的全部被删掉了。
1 | (.5) pkg> add Pluto |
https://techytok.com/from-zero-to-julia-using-docker/
docker pull Julia
Add Julia 使用 jupyter环境—-》安装目录 ~/.Julia
Pluto快捷键
| Which keys? | Action | |
|---|---|---|
| ✅ | F1 or Ctrl+Shift+? |
List shortcuts |
| ✅ | Shift+Enter |
Run cell |
| ✅ | Ctrl+Enter |
Run cell if the code changed and add a new cell below |
| ✅ | Ctrl+S |
Run all cells with modified code in a single batch |
| ✅ | Tab |
Autocomplete |
| ✅ | Backspace or Delete |
Delete empty cell (delete code manually first) |
| ✅ | Page+Up and Page+Down |
Edit cell above/below |
| ✅ | Ctrl+Q |
Interrupt all cells |
| ✅ | Ctrl+P |
Export to PDF |
| ⚪ | Ctrl+Z but it’s tricky |
Undo delete cell |
| ⚪ | TBD | Fold/unfold cell |
| ⚪ | Ctrl+Up and Ctrl+Down |
Move cell(s) up/down |
| ✅ | Alt+Up and Alt+Down |
Move line(s) up/down |
| ⚪ | Ctrl+Shift+S |
Move notebook file |
| ✅ | Ctrl+/ or Cmd+/ |
Comment/uncomment selection |
| ⚪ | TBD | Wrap in begin ... end |
| ⚪ | TBD | Wrap in let ... end |
| ⚪ | Ctrl/Cmd+C and Ctrl/Cmd+V |
Cut, copy & paste cell(s) |
| ⚪ | TBD | Add cell without running |
| ⚪ | Ctrl+primary click |
Jump to definition |
| ⚪ | TBD |
atom环境- Julia 项目管理
- atom安装
- 插件安装-Julia-client & uber-juno
- enter to start Julia
- add PkgTemplates
- init a github repo
1 | t = Template(; |
using Revise -更新时候不用重启julia #初学者暂时不加
具体代码示例参考https://github.com/Jiaqi-knight/JuliaExampleTest.jl
1
2
3
4
5
6
7
8
9
10
11# /src/JuliaExampleTest.jl
# 主函数
module JuliaExampleTest
# Write your package code here.
greet() = print("hello word!")
include("subfunction.jl")
export subfunction
end1
2
3
4# /src/subfunction.jl
# 子函数
subfunction(x,y) = 3x+2y1
2
3
4
5
6
7
8
9
10
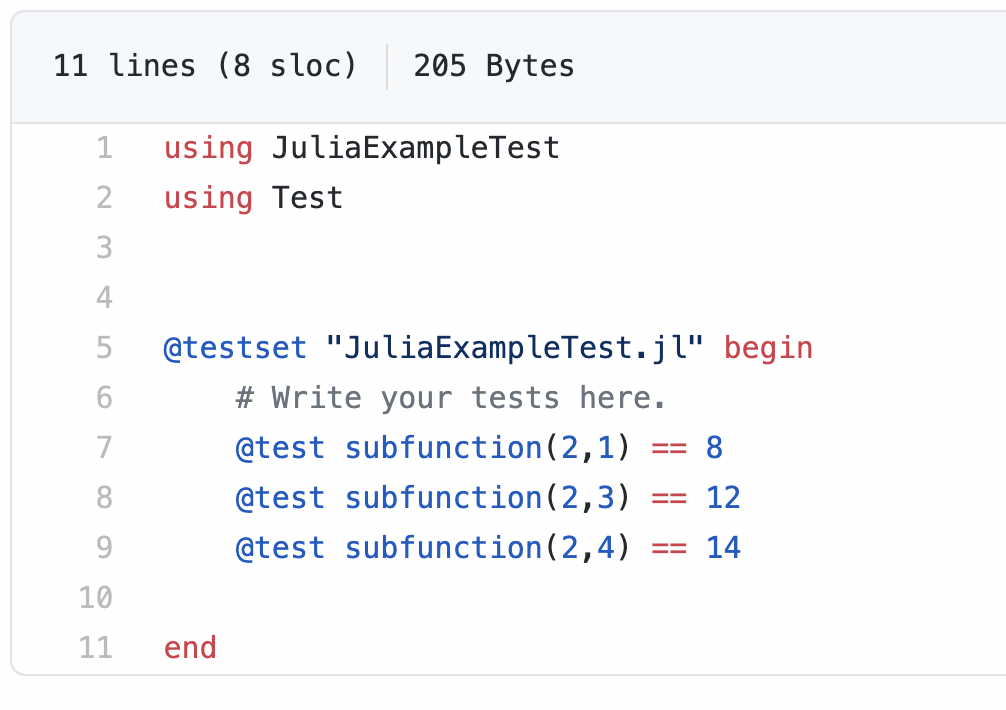
11# /test/runtests.jl
# 用来检查code
using JuliaExampleTest
using Test
"JuliaExampleTest.jl" begin
# Write your tests here.
subfunction(2,1) == 7
subfunction(2,3) == 13
endgithub desktop — Git push to the github if necessary
Travis CI —测试你的代码是否适用
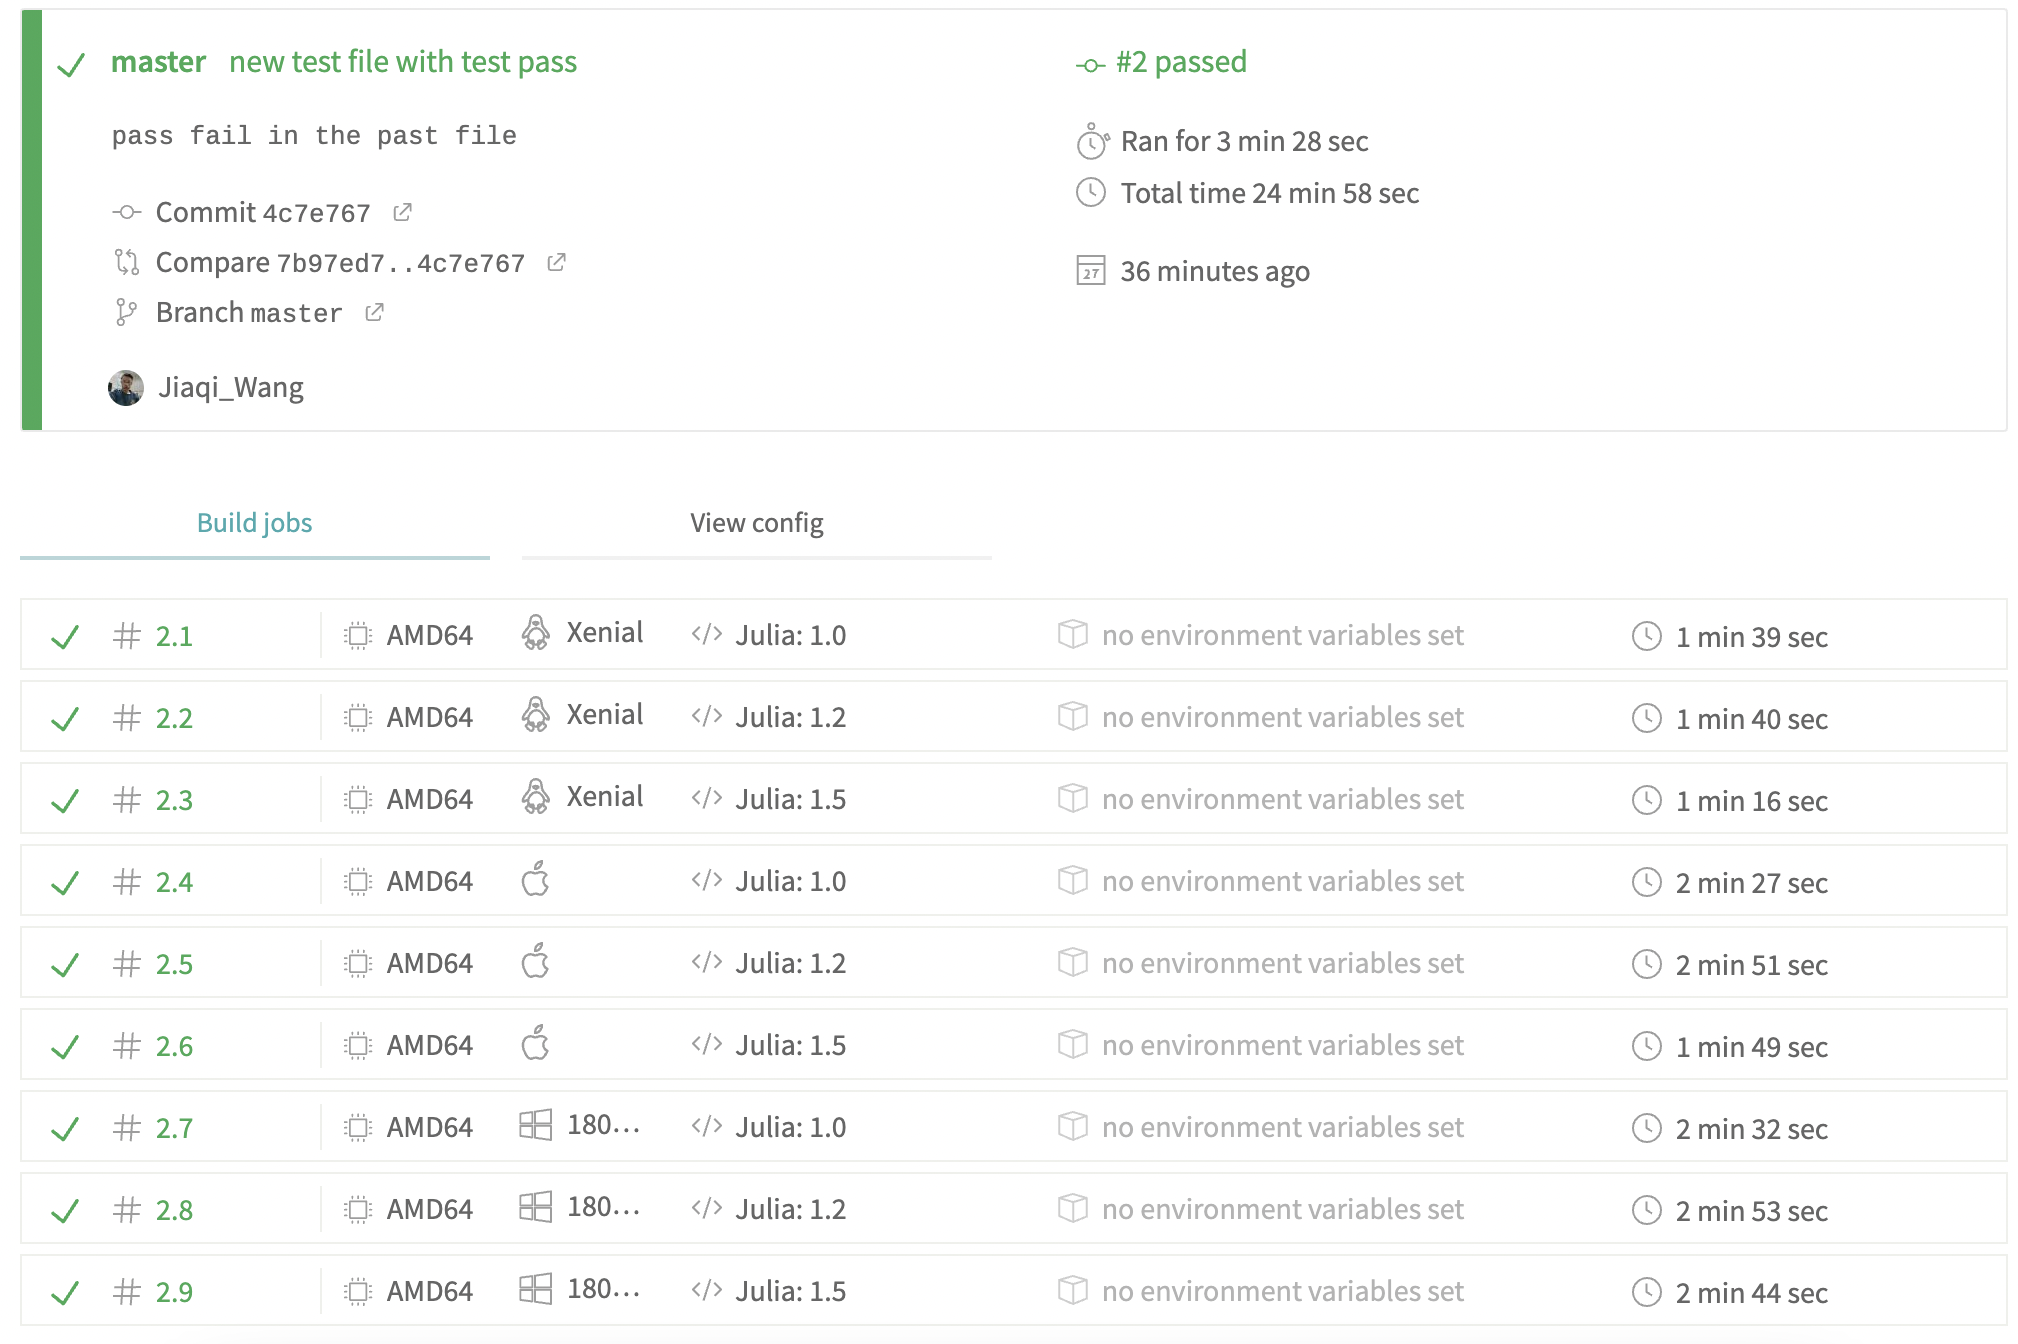
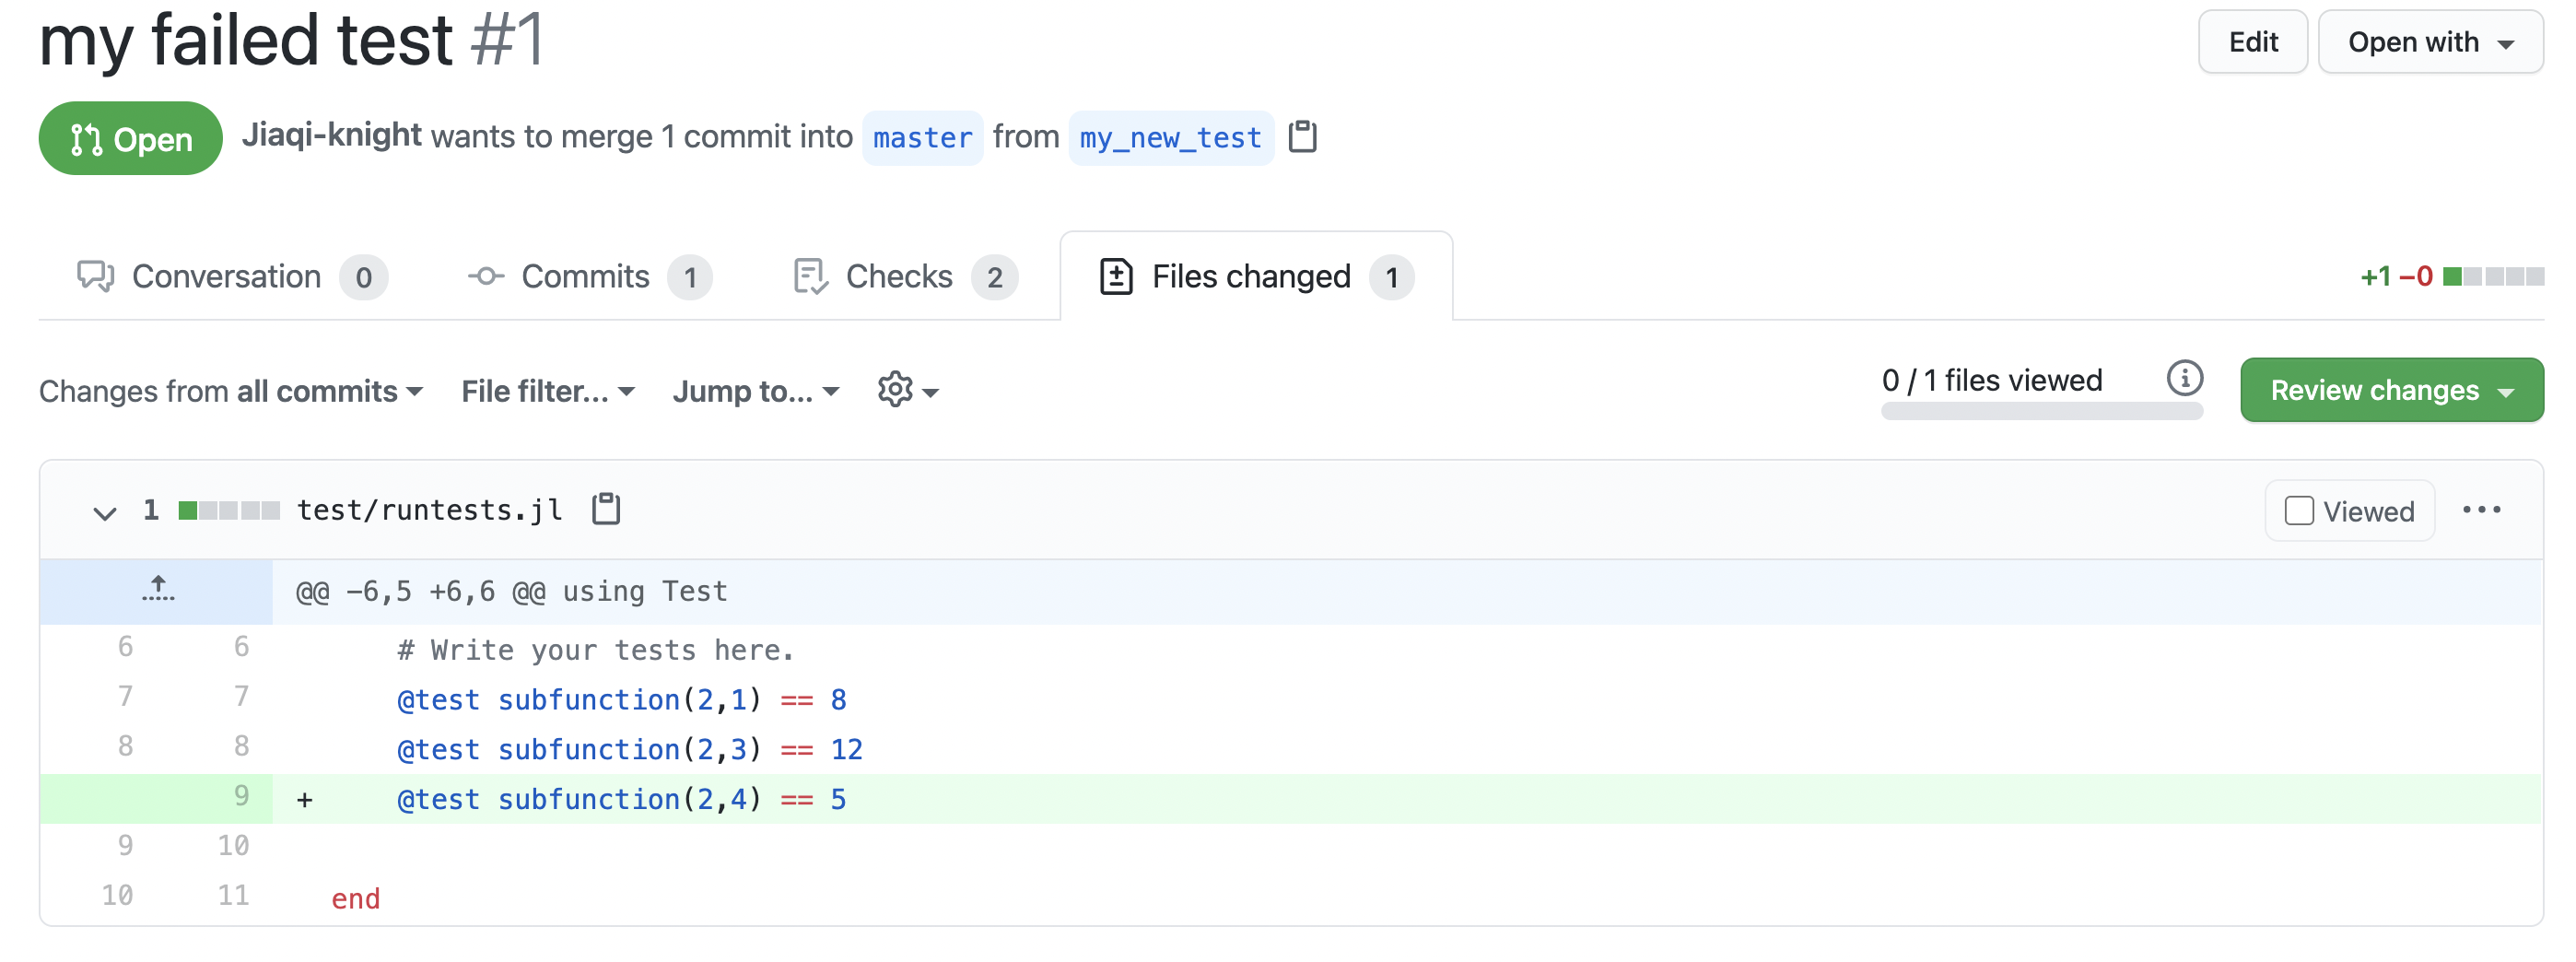
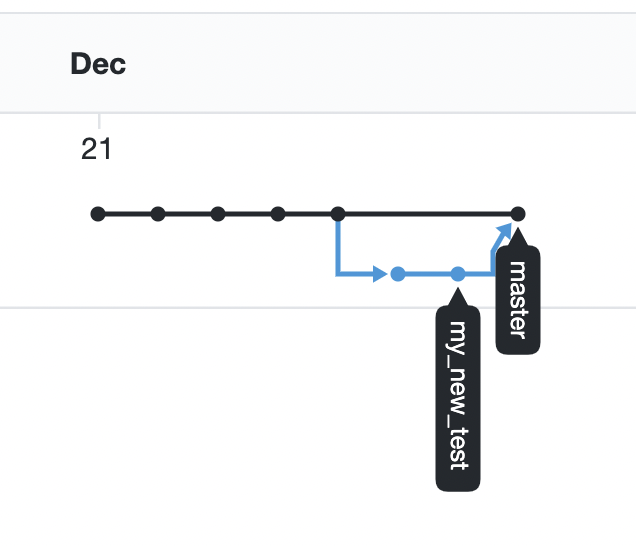
- 建立branch,然后修改代码做一些测试,pull request会更新这些,以及和原代码对比,同时Travis CI会对branch代码做测试。这些操作都不会影响主

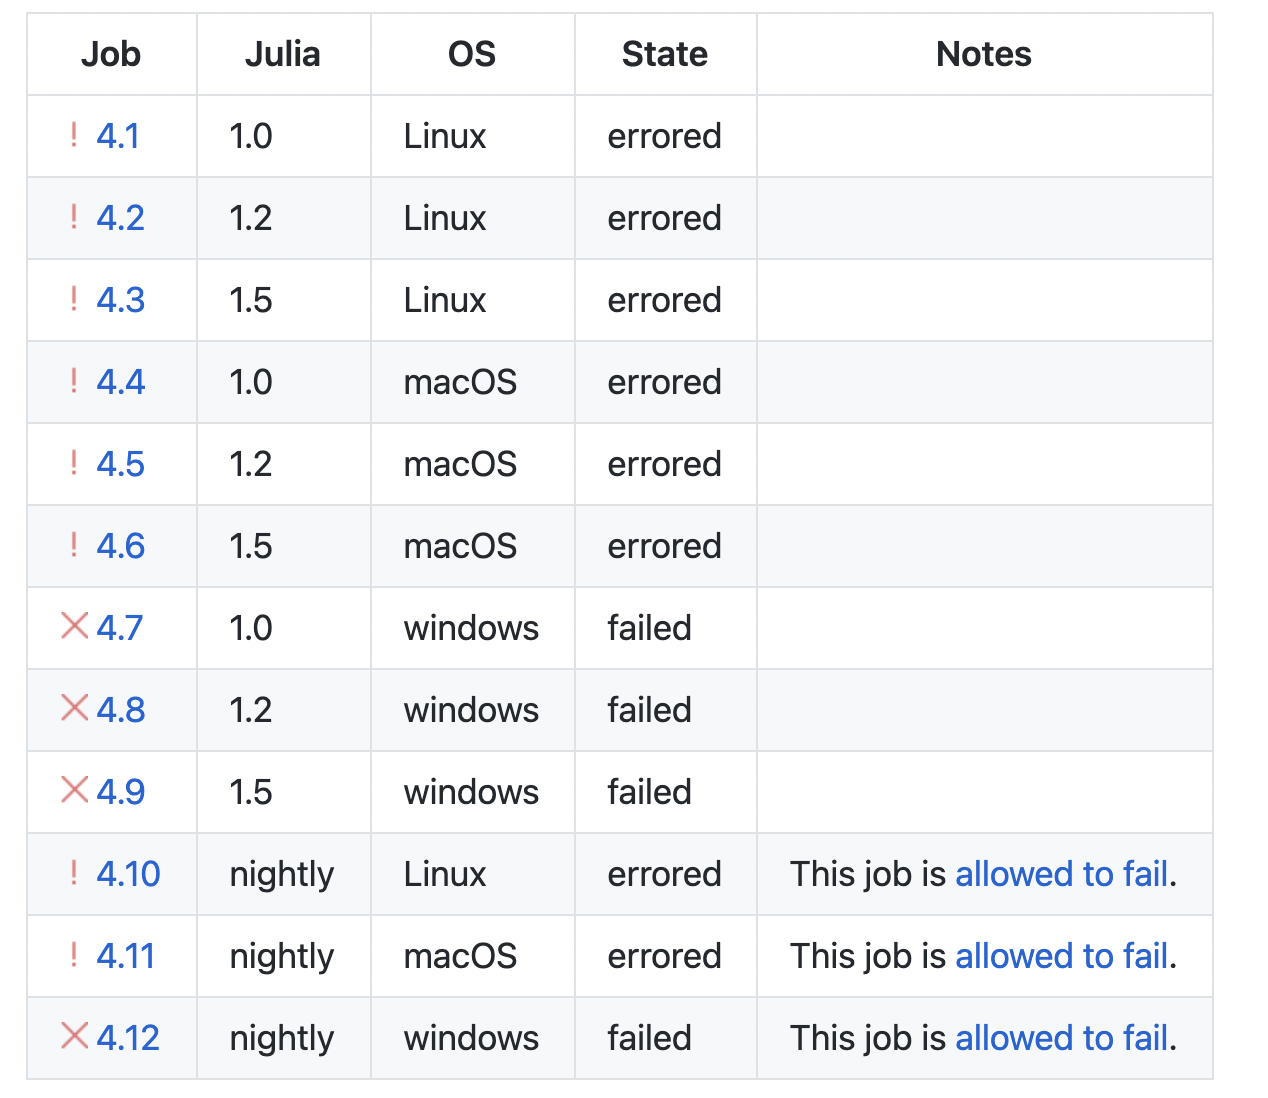
- 如果解决了问题,就可以Merge Pull request, 此时该oull request也被关闭掉了。新的改动将合并到
Pluto的使用
Pluto是一款时尚的IDE编辑软件,类似于jupyter,但更加注重markdown和一些互动功能的扩展。其本质是Markdown和InteractiveUtils环境的jupyter集成。
因此,在写该jl文件时,抬头包含如下代码行:
1 | ### A Pluto.jl noterbook### |
1 | # 插入markdown语法于Pluto也非常简单 |
atom 安装weave
可以用来生成网页。
Julia图像处理 by 3blue1brown
1 | pkg> add Plots |
抽象Abstraction
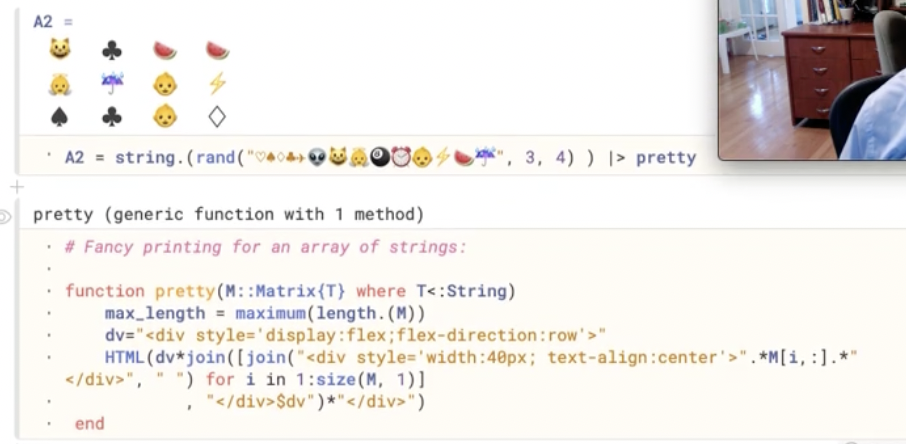
数组array是一个容器,包含元素,元素可以是任何类型的,这是matlab所没有的。就这个功能非常牛逼,拓展性非常强。
julia不仅将python的array语法囊括了,更将java的一些网站语言包含其中,因此对于一些符号、图像、任何元素的矩阵排练,也轻而易举实现,公式符号的优美性不会因为语言而流失。这是相当难得的,是基于web的语言。

Arrays 基础
- @view 浅复制- SubArray —》指向同一个地址
改变复制的结果,也会改变父本
- = copy 深复制 —-〉开销比较大,要新开内存
示例代码
链接: https://pan.baidu.com/s/1WnW3cfygz7WKOKzDemGzsA 密码: 7acb
Julia性能提升技巧总结

@doc 宏来查看或者编辑文档。
最后一行作为返回值,或者nothing
一切都是对象,但julia的对象都是一个类型的实例。
类型在 Julia 中主要有两个作用:一是用来派发方法(method),二是用来包装数据结构。
julia的类型主要分为抽象类型(Abstract Type)和 实体类型(Concret Type),实体类型主要分为可变类型(Mutable Type)和 不可变类型(Immutable Type)。前者是成员的值在定义之后可变的类型,后者是成员的值在定义之后不可变的类型。
多重派发
Julia 通过结合 JIT 解决了这个问题,Julia 的编译过程是动态的,每次编译发生在函数被调用之前。这就意味着当编译器能够正确推导出类型的时候,我们就可以进行静态派发,当编译器无法推导类型的时候,我们自动进行动态派发。这表现为 Julia 语言的类型稳定性(type stability)。而所有的编译都以函数为界。这也就是说,如果函数 f1 是类型不稳定的,但是实际的程序中它的输出输入到一个类型稳定的函数 f2 里,Julia 依然能够被静态编译 f2,使得 f2 内部的函数派发变成静态的。
打开julia :
1 | exec '/Volumes/Julia-1.4.2/Julia-1.4.app/Contents/Resources/julia/bin/julia' |
更换julia服务器
1 | ENV["JULIA_PKG_SERVER"] = "https://mirrors.bfsu.edu.cn/julia" |
cmake error
1 | ENV["CMAKE_JL_BUILD_FROM_SOURCE"]=1 |
(@v1.5) pkg> build ADCME
Building Conda ─→ ~/.julia/packages/Conda/x5ml4/deps/build.log
Building PyCall → ~/.julia/packages/PyCall/tqyST/deps/build.log
Building CMake ─→ ~/.julia/packages/CMake/ULbyn/deps/build.log
Building HDF5 ──→ ~/.julia/packages/HDF5/YX0jU/deps/build.log
Building FFTW ──→ ~/.julia/packages/FFTW/eADNB/deps/build.log
Building ADCME ─→ ~/.julia/packages/ADCME/hCmEo/deps/build.log
┌ Error: Error building ADCME:
│ Collecting package metadata (repodata.json): …working… done
│ Solving environment: …working… done
│
│ Downloading and Extracting Packages
c-ares-1.16.1 | 91 KB | ########## | 100%
keras-preprocessing- | 36 KB | ########## | 100%
make-4.3 | 249 KB | ########## | 100%
python_abi-3.7 | 4 KB | ########## | 100%
scipy-1.5.1 | 19.0 MB | ########## | 100%
libblas-3.8.0 | 11 KB | ########## | 100%
werkzeug-0.16.1 | 258 KB | ########## | 100%
libopenblas-0.3.10 | 8.2 MB | ########## | 100%
llvm-openmp-10.0.1 | 265 KB | ########## | 100%
ld64-530 | 14 KB | ########## | 100%
libcblas-3.8.0 | 11 KB | ########## | 100%
clang-10.0.1 | 12.1 MB | ########## | 100%
ld64_osx-64-530 | 1.3 MB | ########## | 100%
tapi-1000.10.8 | 4.9 MB | ########## | 100%
openblas-0.3.10 | 9.1 MB | ########## | 100%
ninja-1.10.0 | 108 KB | ########## | 100%
hdf5-1.10.6 | 3.0 MB | ########## | 100%
cloudpickle-1.5.0 | 22 KB | ########## | 100%
google-pasta-0.2.0 | 42 KB | ########## | 100%
tensorflow-1.15.0 | 4 KB | ########## | 100%
_tflow_select-2.3.0 | 3 KB | ########## | 100%
certifi-2020.6.20 | 151 KB | ########## | 100%
numpy-1.19.1 | 5.1 MB | ########## | 100%
conda-4.8.4 | 3.0 MB | ########## | 100%
clangxx-10.0.1 | 123 KB | ########## | 100%
zipp-3.1.0 | 13 KB | ########## | 100%
absl-py-0.9.0 | 162 KB | ########## | 100%
importlib-metadata-1 | 44 KB | ########## | 100%
protobuf-3.12.3 | 688 KB | ########## | 100%
libclang-cpp10-10.0. | 11.7 MB | ########## | 100%
liblapack-3.8.0 | 11 KB | ########## | 100%
termcolor-1.1.0 | 6 KB | ########## | 100%
astor-0.8.1 | 25 KB | ########## | 100%
libllvm10-10.0.1 | 20.8 MB | ########## | 100%
h5py-2.10.0 | 925 KB | ########## | 100%
libgfortran-4.0.0 | 716 KB | ########## | 100%
decorator-4.4.2 | 14 KB | ########## | 100%
libgcc-4.8.5 | 785 KB | ########## | 100%
tensorflow-estimator | 271 KB | ########## | 100%
ca-certificates-2020 | 146 KB | ########## | 100%
tensorflow-probabili | 1.2 MB | ########## | 100%
unzip-6.0 | 149 KB | ########## | 100%
tensorflow-base-1.15 | 75.8 MB | ########## | 100%
grpcio-1.30.0 | 1.9 MB | ########## | 100%
markdown-3.2.2 | 61 KB | ########## | 100%
tensorboard-1.15.0 | 3.8 MB | ########## | 100%
wrapt-1.12.1 | 42 KB | ########## | 100%
libprotobuf-3.12.3 | 2.1 MB | ########## | 100%
openssl-1.1.1g | 1.9 MB | ########## | 100%
gast-0.2.2 | 10 KB | ########## | 100%
opt_einsum-3.3.0 | 51 KB | ########## | 100%
keras-applications-1 | 29 KB | ########## | 100%
lapack-3.6.1 | 2.1 MB | ########## | 100%
│ Preparing transaction: …working… done
│ Verifying transaction: …working… done
│ Executing transaction: …working… done
│
│
│ ==> WARNING: A newer version of conda exists. <==
│ current version: 4.8.3
│ latest version: 4.9.2
│
│ Please update conda by running
│
│ $ conda update -n base -c defaults conda
│
│
│ #
│ # To activate this environment, use
│ #
│ # $ conda activate base
│ #
│ # To deactivate an active environment, use
│ #
│ # $ conda deactivate
└ @ Pkg.Operations /Users/julia/buildbot/worker/package_macos64/build/usr/share/julia/stdlib/v1.5/Pkg/src/Operations.jl:949
Julia package
然后将其分发到github上面
1 | echo "# swirlflow.jl" >> README.md |
C:\Users\wjq>C:\Users\wjq.julia\adcme\python.exe -m pip install \Mac\Home\Desktop\tensorflow_cpu-2.3.0-cp37-cp37m-win_amd64.whl -i http://pypi.douban.com/simple —trusted-host pypi.douban.com
首先,通过PkgTemplates.jl创建package
1
2
3
4
5
6
7
8
9
10
11
12
13
14
15
16
17
18using PkgTemplates
t=Template(;
user="Jiaqiwang969",
dir="./",
authors="Jiaqi-knight",
julia=v"1.5.3",
plugins=[
License(; name="MIT"),
Git(; manifest=true, ssh=true),
GitHubActions(; x86=true),
Documenter{GitHubActions}(),
],
)
t("Swirlflow.jl")- 在github官网建立仓库,仓库名为Swirlflow.jl
- git status, git add ., git commit -m “Changes: Version, Test; Message: commenting extra block…”, git push origin master
- git tag v0.1.0, git push —tag
- atom 进入 folder, activate . , add package
- Add function in src folder, 注意名字不要写错
- using Swirlflow 如果成功,表示function之间的关联都没有问题了。
- 通过ci actions 自动生成document,检查代码在不同环境的兼容性问题
- add documents in docs
- 创建issue, @JuliaRegistrator register 等几天
- 然后就是下载documenterTools,注册账号,自动上传,遗憾电脑的原因没能安装成功,后续再想办法 是解压的问题

